
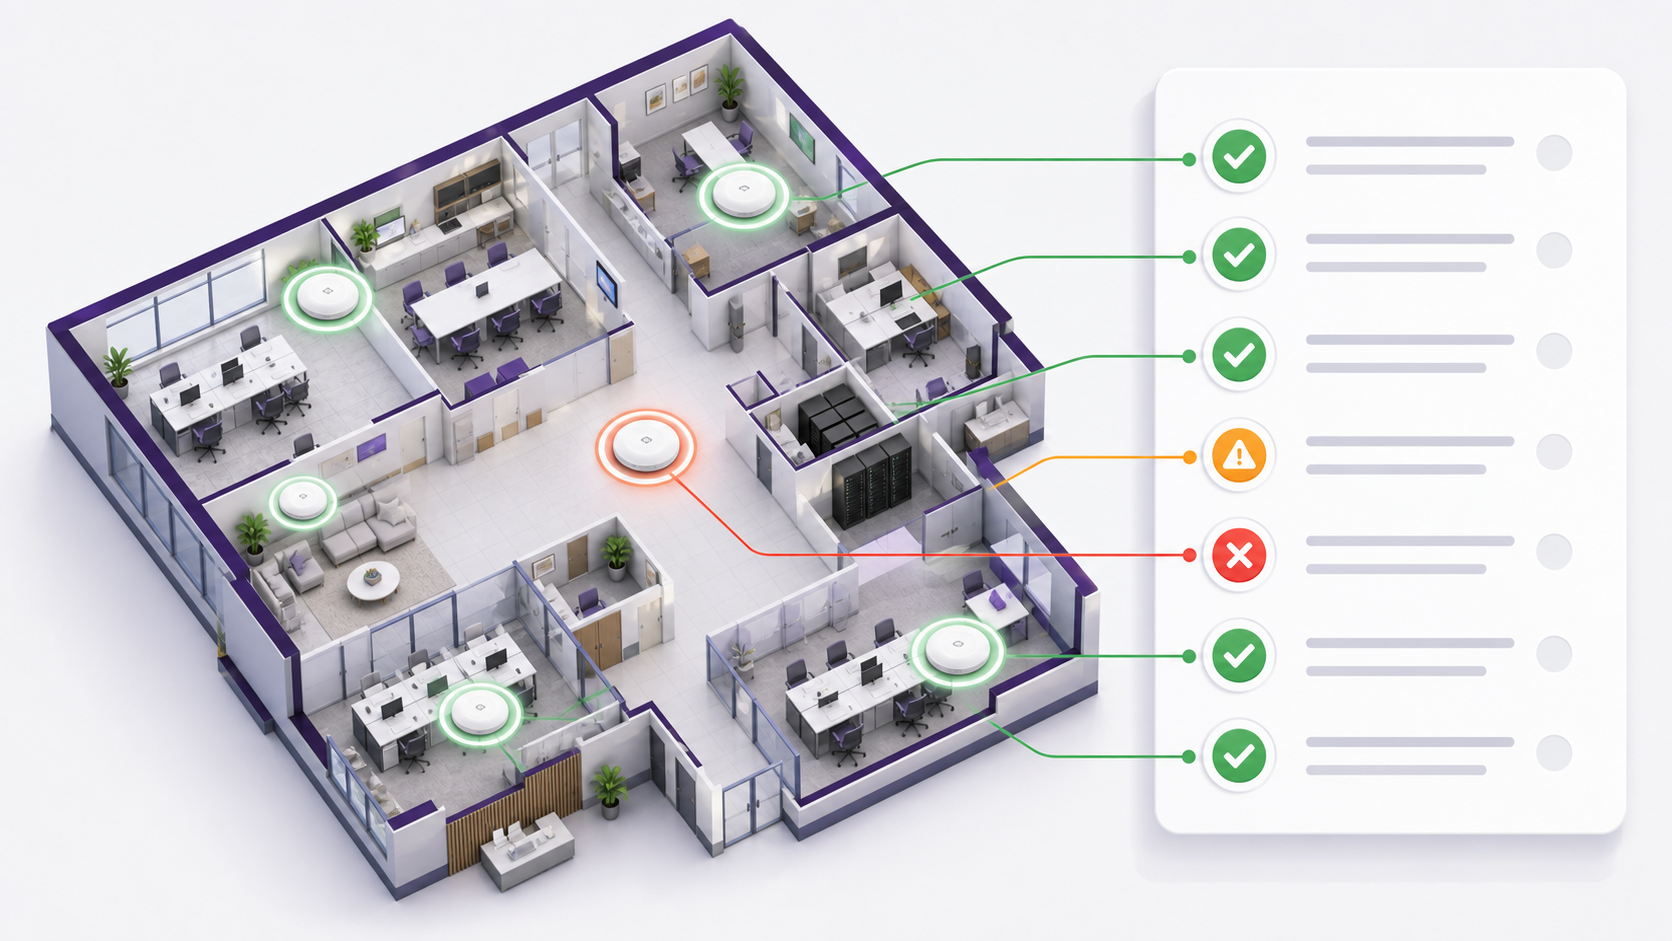
Validating Wi-Fi Deployments with Custom Checklists
Most professional Wi-Fi deployments are built against some kind of standard, whether that’s a formal company policy, a client’s security requirements, or simply the set of best practices you’ve learned to insist on over years of deployments. WPA3 everywhere. Non-DFS channels on 5 GHz. A specific country code. Consistent channel widths across every AP on site.
The trouble is enforcing that standard once you’re actually on site with dozens, or hundreds, of BSSIDs in front of you. Doing it manually means scanning through a network list yourself, cross-referencing every SSID against a mental checklist, and hoping you don’t miss anything. It’s slow, and it’s inconsistent between engineers.
The Checklists feature in WiFi Explorer Pi removes that manual step entirely. Define your criteria once, apply the checklist to a scan, and the app scores every SSID it sees against those criteria, per band, giving you an instant percentage compliance score you can drill straight down into.
The Checklists feature was inspired by the community-driven Wi-Fi validation framework developed by WLAN Professionals and its contributors. Their work helped shape the criteria and approach used in WiFi Explorer Pi.
What Checklists Does
A checklist is a saved set of validation criteria covering things like channel selection, channel width, security mode, RSSI thresholds, channel utilisation, and roaming feature support. Once you’ve built and configured a checklist, you apply it to any SSID within a scan, and WiFi Explorer Pi automatically compares every BSSID broadcasting that SSID against the criteria you’ve enabled.
The result is a compliance score, broken down by band, telling you at a glance whether 2.4 GHz, 5 GHz, and 6 GHz are meeting your standard, and if not, exactly which criteria are failing and on which specific BSSIDs. It’s the difference between eyeballing a network list and having the app do the heavy lifting and tell you precisely what’s out of spec and why.
Why It’s Useful
Manual validation doesn’t scale. On a small site with a handful of APs, checking each one by hand against a standard is tedious but doable. On a large enterprise campus, a hospital, or a multi-tenant building with hundreds of BSSIDs, it’s simply not realistic to do consistently, and inconsistency is exactly what gets missed during an audit or handed back as a support ticket weeks later.
Checklists turns validation into something repeatable and objective. The same criteria get applied the same way every time, by every engineer on the team, regardless of who’s on site that day. And because the checklist itself can be exported and shared, an organisation can build one standard once and distribute it, so every engineer starts from an identical baseline rather than reconstructing the same rules from memory on every visit.
When and Where to Use It
Checklists earns its place in a few recurring scenarios: validating a new deployment against the design spec before sign-off, auditing an existing network against a corporate or client standard, and troubleshooting a specific complaint by quickly identifying which BSSIDs deviate from the expected configuration. It’s equally useful whether you’re the engineer who designed the standard or the field engineer being handed someone else’s checklist file to enforce on site.
How to Use Checklists
Checklists live under the app’s Settings. Tap the gear icon, scroll to Network Validation, and tap Checklists.
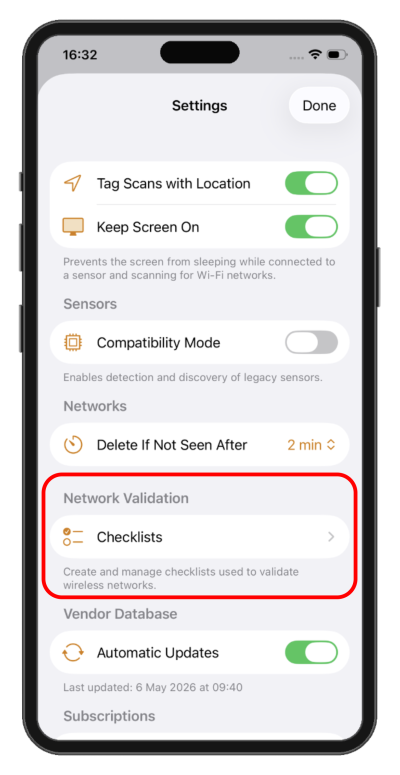
The Network Validation → Checklists entry in Settings.
The first time you open this screen, the app has already seeded a default checklist named “Checklist 1,” tagged with a Finish Setup badge since nothing has been configured yet. A + button lets you create additional checklists from scratch, and an import button lets you load a checklist someone else has already built and shared with you.
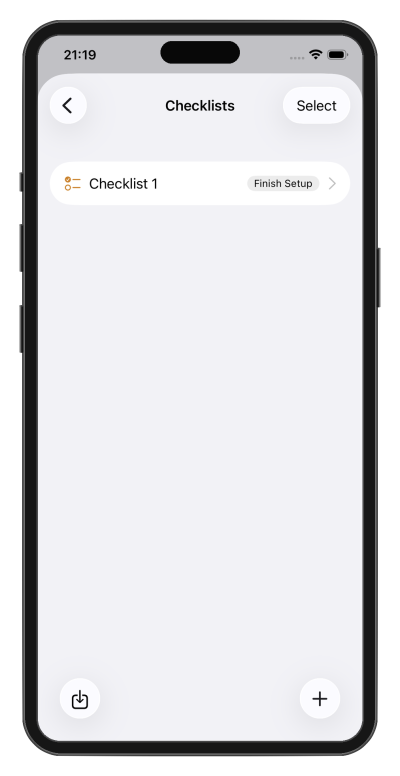
The default “Checklist 1” checklist with its Finish Setup badge.
Swipe left on the row to rename it to something meaningful, like “Corp Standard” or “Hotel Deployment,” then tap the row to open the criteria editor.
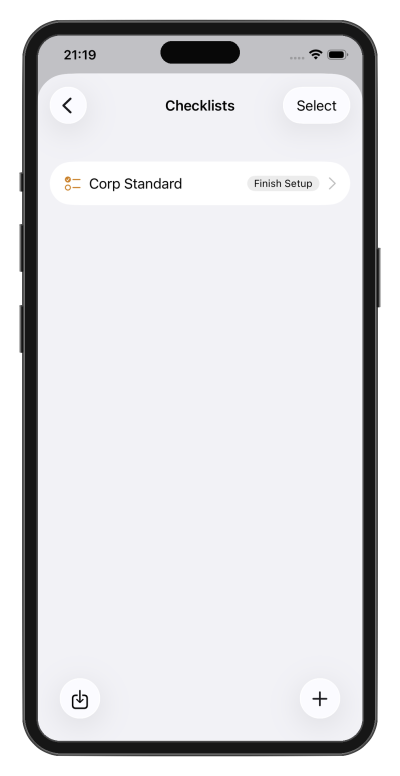
The checklist renamed to “Corp Standard”.
The editor lists 20 available checks across eight categories: RF Planning, Regulatory, Coverage, Capacity, SSID & Security, Client Compatibility, Roaming, and Other. These cover things like allowed channel sets per band, channel width, minimum RSSI thresholds, channel utilisation ceilings, required security mode, and support for roaming standards like 802.11k, r, and v. Every criterion is enabled by default; toggle off anything that isn’t relevant to your deployment, and use the Disable All button if you’d rather start from a blank slate and enable only what you need.
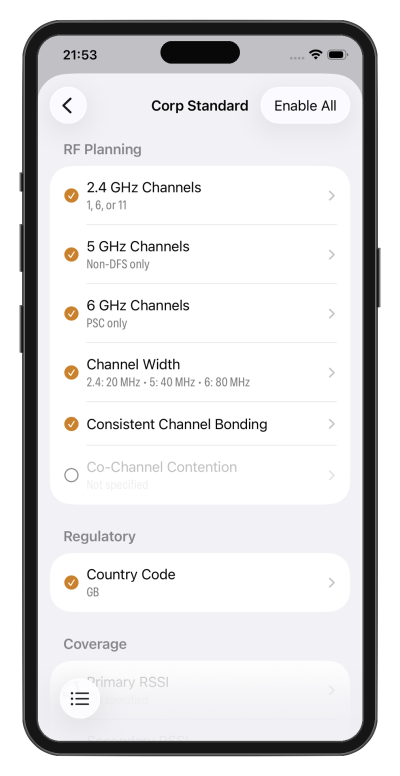
A checklist with only the relevant criteria enabled; the rest are greyed out and excluded from scoring.
Tap any enabled criterion to set its required value. For example, 5 GHz Channels can be locked to “Non-DFS only” if your deployment policy avoids DFS channels to prevent radar-triggered channel changes, and Country Code can be set per band to confirm every AP is advertising the correct regulatory domain.
Once you’ve configured your criteria, tap back out of the editor to return to the Checklists list. The badge on the checklist’s row, previously showing Finish Setup, now shows a count of how many of the 20 available criteria you’ve enabled and configured, for example 6/20, meaning only those 6 will count towards the compliance score. The Finish Setup badge clears once every enabled criterion has a value assigned to it.
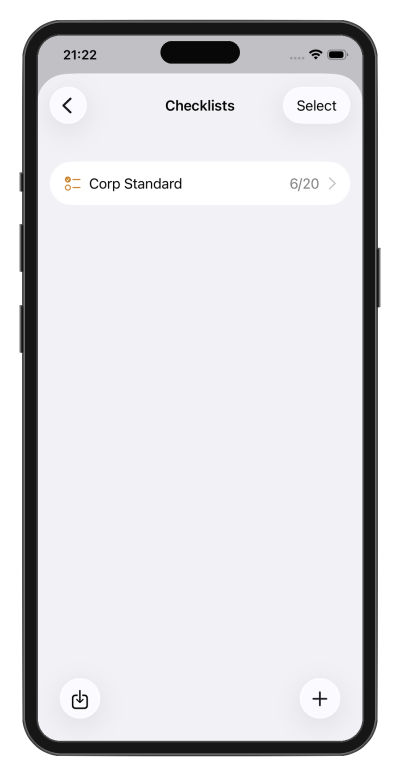
The “Corp Standard” checklist showing 6/20 criteria configured; the Finish Setup badge has cleared.
With a checklist built, open a scan, tap an SSID to view its details, and scroll to Network Validation. Tap the Checklist field (initially showing None) to choose your checklist from the list. The app immediately calculates a compliance score and displays it as a percentage badge.
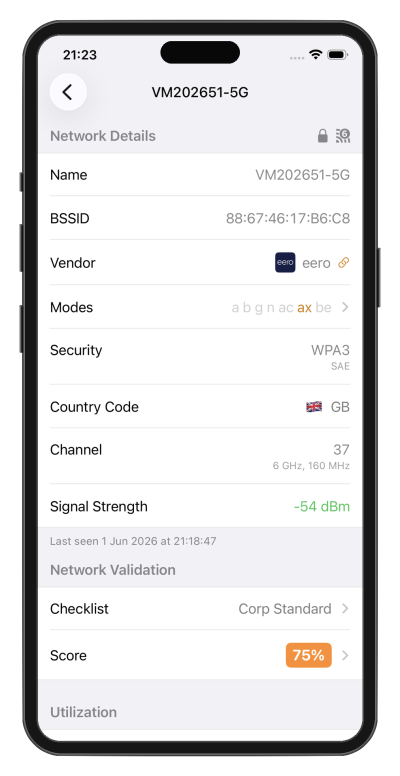
An SSID scoring 75% against the Corp Standard checklist.
Tap the Score row for the full breakdown. Results are organised by band, each showing its own percentage and a count of compliant versus non-compliant BSSIDs.
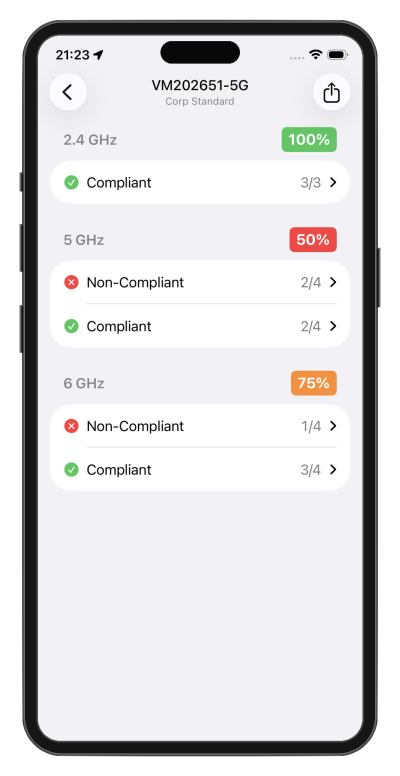
Per-band compliance breakdown: 2.4 GHz at 100%, 5 GHz at 50%, 6 GHz at 75%.
Tapping a Non-Compliant row expands to show which specific criteria are failing on that band, and tapping a failing criterion drills down further to show exactly which BSSIDs are responsible and what value they’re actually broadcasting against the threshold you set. It’s common to find that a single misconfigured radio is behind multiple failures at once, for example, an AP left on a DFS channel and running a wider channel width than the standard allows, both flagged from the one BSSID.
Once you’ve reviewed the results, the score detail view has a share button that exports the full findings as a PDF compliance report, complete with every failing section and the specific BSSIDs responsible. It’s a clean way to hand results to a network support team without them needing to be on site or to attach to a sign-off document.
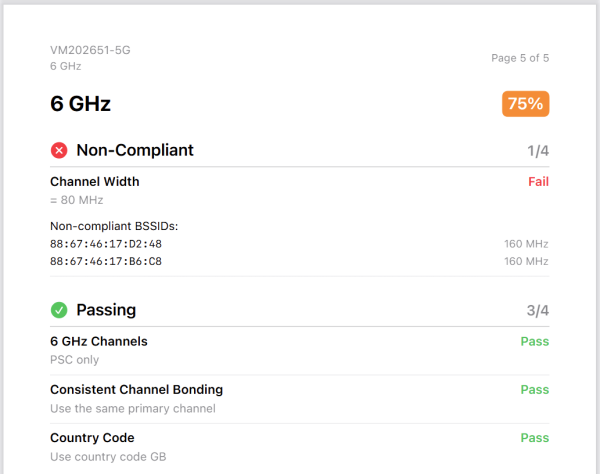
An extract from an exported PDF compliance report.
Checklists themselves can also be exported and imported as compact .checklist files, so a standard built and tuned by one engineer can be distributed across a whole team without anyone needing to rebuild it from scratch.
Give It a Try
If you’ve already got a copy of WiFi Explorer Pi, Checklists is worth setting up the next time you need to validate a site against a defined standard rather than eyeballing a network list. Build a checklist with just a handful of criteria that matter most to you, apply it to a live scan, and see how quickly it surfaces the BSSIDs that need attention.
About the Author: Nigel Bowden




Hi Nigel – Thanks for sharing this article and super useful. One thing that I noticed is checklist not valid or does not appear for hidden SSIDs.