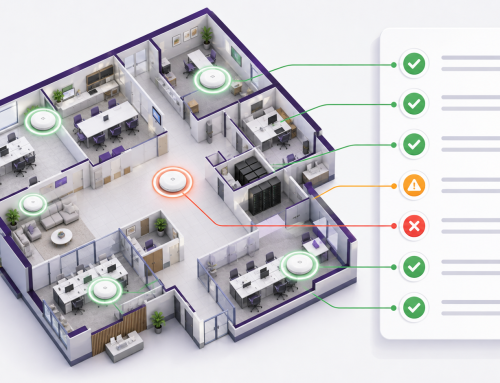
Finding Hidden Access Points with AP Finder in WiFi Explorer Pi
Every Wi-Fi professional has been there: you know an AP is somewhere in the ceiling, behind a cabinet, or buried in a comms cupboard, but the floor plan is wrong, the label’s missing, or nobody on site remembers where it went in. Tracking it down by guesswork, by lifting every ceiling tile in the corridor, or by tracing cable runs back from the patch panel isn’t a great use of an afternoon.
AP Finder, a feature built into WiFi Explorer Pi, turns this into a quick, methodical exercise. Point it at a specific BSSID and it plots that AP’s signal strength in real time as you move through the space, turning your iPhone or iPad into the Wi-Fi equivalent of a cable tone tracer. Follow the signal upward and you’ll converge on the AP, usually within a few minutes.
What AP Finder Does
AP Finder takes a BSSID you’ve selected from a live scan and switches the connected sensor into fast scanning mode on that AP’s channel. Instead of cycling through every channel to build a full network list, the sensor focuses its attention on one channel and streams RSSI readings continuously, so the app can plot a live, responsive graph of signal strength as you walk.
The OTG requirement comes down to mobility rather than scanning capability. Any sensor can perform the continuous channel scanning AP Finder depends on, but the locator screen has you walk toward the AP, which only works with a sensor that’s physically moving with you. A remotely connected sensor stays wherever it’s mounted, so walking around with your iPhone or iPad doesn’t change its vantage point, and a stored or imported capture has no live signal to follow at all. That’s why AP Finder only appears during a live scan over a direct OTG connection, with a WLAN Pi Go or NanoPi Zero2 tethered to your iPhone or iPad via USB-C. If you’re not connected via OTG, the AP Finder button simply won’t be there.
Why It’s Useful
Locating a specific AP by sight alone gets harder than it sounds once you’re dealing with a real building. Ceiling tiles hide APs identically. Riser cupboards, false floors, and plant rooms swallow access points that were never labeled in the first place. Floor plans drift out of date as buildings get refurbished, and “the AP should be roughly here” is rarely good enough when you need to physically access it for a firmware update, a cable check, or a swap-out.
AP Finder solves this directly by giving you a live, moving number to chase rather than a static reference point. It’s faster than manually re-scanning and eyeballing RSSI values from a list, and it doesn’t require any special hardware beyond the sensor you’re probably already carrying.
When and Where to Use It
AP Finder is squarely an on-site tool. Reach for it whenever you’re standing in the space in question and need to resolve an AP’s physical location: during a post-deployment audit when APs weren’t labelled as they went in, or during troubleshooting when a specific radio needs a hands-on look.
How to Use AP Finder
Start a live scan with your sensor connected via OTG. If the network list is long and busy, use the search filter to narrow it down to the specific BSSID you’re chasing. Entering even a partial BSSID string is often enough to isolate a single AP or mesh node from a crowded list.
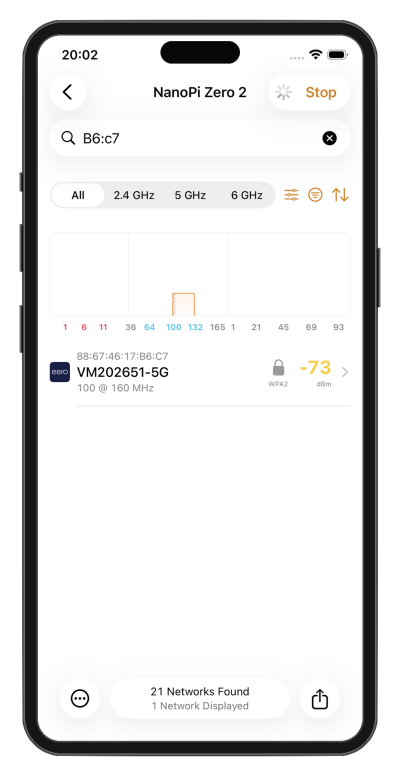
Filtering the scan list down to a single target BSSID using a partial BSSID search.
Tap the target BSSID to open its Network Details screen. In the top-right corner you’ll see a crosshair icon; this is the AP Finder button, and it only appears when you’re connected via OTG and actively scanning live.
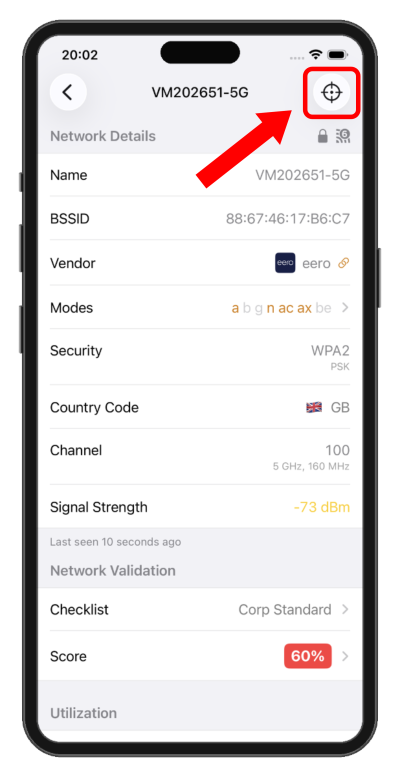
The crosshair icon in the top-right corner of the Network Details screen launches AP Finder.
Tap the crosshair and the app switches straight into fast scanning mode on the target AP’s channel, plotting RSSI continuously as readings arrive.
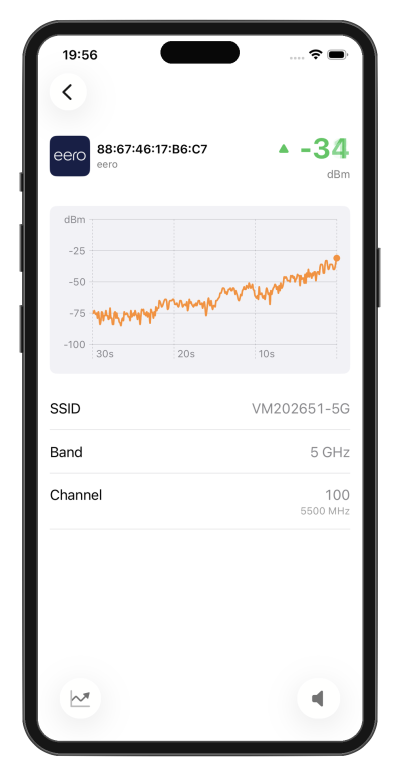
The AP Finder display, showing RSSI climbing from around -80 dBm to -34 dBm as the sensor moves toward the AP.
The current RSSI value sits prominently at the top of the screen with a trend arrow showing whether the signal is strengthening or weakening, and the SSID, band, and channel are displayed for reference underneath the graph.
From here, the technique itself is simple: walk slowly through the space, watching the number and the trend line. Climbing RSSI means you’re heading the right way; a drop means it’s time to turn around. In a large open area, start with broad sweeps to get a rough bearing, then tighten your search as the signal strengthens. Most APs can be pinned down within a few minutes this way.
There’s also an audio option worth knowing about. Tap the speaker icon at the bottom right of the screen to enable a continuous beeping tone whose interval shortens as RSSI improves, exactly like a parking sensor or a Geiger counter. It’s a genuinely useful mode when you’d rather keep your eyes on the ceiling, the cabinet, or the space around you than on the phone screen.
Give It a Try
If you’ve already got WiFi Explorer Pi and a compatible sensor, AP Finder is worth trying the next time you’re on site with an AP that’s proving hard to pin down. Connect your sensor over OTG, filter to the BSSID you care about, tap the crosshair, and start walking.
About the Author: Nigel Bowden