
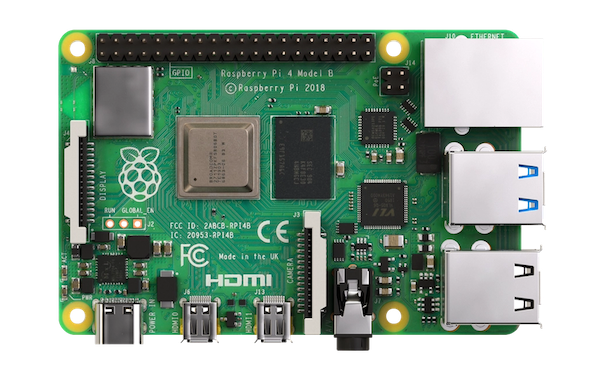
Using a Raspberry Pi 4 as a Remote Sensor for WiFi Explorer Pro and Airtool
You can use sensors with WiFi Explorer Pro 3 and Airtool 2 to scan Wi-Fi networks and do packet captures remotely. A sensor can be any Linux device with a compatible Wi-Fi adapter configured with the necessary packages to enable remote Wi-Fi scanning and packet capture capabilities.
This blog post will show you how to configure a Raspberry Pi 4 with an external Wi-Fi adapter to be used as a remote sensor in WiFi Explorer Pro and Airtool. We will assume you have a fresh installed Raspberry Pi 4 using Raspberry Pi OS.
The Raspberry Pi 4 comes with an onboard Wi-Fi adapter, but we will use an external adapter instead because the onboard Wi-Fi adapter doesn’t support monitor mode out of the box. Monitor mode lets us “sniff” Wi-Fi traffic, which we need for Wi-Fi scanning and packet captures. Many external adapters support monitor mode. For this blog post, we will be using the Comfast CF-912AC USB Wi-Fi adapter.
Update (2021-03-08): We have observed, as well as other users using other platforms such as the WLAN Pi, that the Comfast CF-912 AC USB adapter might not be capturing all 802.11ac data frames (click here to read more about it). A better adapter option is the MediaTek MT7612U, which has the same capabilities as the CF-912AC but is more stable and works out-of-the-box in the latest Raspberry OS version.
Prepare the Raspberry Pi
If you haven’t done it already, the first thing you need to do is set the country where the Raspberry Pi 4 is being used. Otherwise, rfkill, a process that the system uses to enable and disable wireless devices, will prevent you from using any wireless adapter until you set the region that determines the wireless adapter’s operation rules.
To set the country, run raspi-config.
Choose Localisation Options > WLAN Country, and select the country in which you’re located.

Then, you need to install a few dependencies and tools that are required to build the wireless drivers for the Comfast CF-912AC adapter:
Build and install the wireless drivers
After the Raspberry Pi 4 restarts, you can proceed to build and install the wireless drivers. We will use aircrack-ng’s fork of the original RTL8812AU drivers that enables monitor mode:
Once you finish installing the driver, attach the external adapter to the Raspberry Pi 4 and confirm a new Wi-Fi interface is available, e.g., wlan1:

Configure the Raspberry Pi 4 as a remote sensor
At this point, you can already use the Raspberry Pi 4 as a remote sensor in Airtool 2. To learn more about doing remote packet captures, see Capture using a remote sensor. To use the Raspberry Pi 4 as a remote sensor in WiFi Explorer Pro 3, you need a few more steps.
First, you need to install some package dependencies:
Then, install the wifiexplorer-sensor script, which enables the remote Wi-Fi scanning functionality using WiFi Explorer Pro 3. Verify the interface name of the external adapter, e.g., wlan1. If it’s different than wlan1, then replace wlan1 below with the actual interface name.
The Raspberry Pi 4 is now ready to be used as a remote sensor in WiFi Explorer Pro 3. To learn more about remote sensors and WiFi Explorer Pro 3, see Connect to a remote sensor.

Conclusion
To use a Raspberry Pi 4 as a remote sensor in WiFi Explorer Pro 3 and Airtool 2, you need a compatible Wi-Fi adapter that supports monitor mode and to install the wifiexplorer-sensor script. In this blog, we have described how to configure a Raspberry Pi 4 as a remote sensor using the Comfast CF-912AC USB Wi-Fi adapter.
About the Author: Adrian Granados


When I try to download the rt18812au driver from github I get a repository not found error.
Any Ideas
Figured it out its a lower l not a 1… seeing and reading well is required…
where are the rest of the command lines?
There’s seems to be an issue with the syntax highlighting. I’ll look into it.
Thank you for letting me know.
I have recently come into a handful of Raspberry Pi 3A+ units, and I’ve hit a bit of a roadblock on using them the same way as the Pi 4.
I’ve installed Kali Linux on the SD card, installed the sensor scripts, connected it to a trial version of WiFi explorer 3 Pro, and been able to successfully add the unit and run diagnostics on it. I have it plugged into Ethernet via a USB adapter, and have the WiFi interface disconnected.
For some reason that escapes me, it’s unable to place the Pi into monitor mode. I specifically put Kali on it so I knew it can and would go into monitor mode. I can run airmon-ng from ssh, so I can’t imagine why it’s showing me the following diagnostic. Any help would be appreciated.
Connecting over SSH to 192.168.254.38 on port 22: OK
Checking ifconfig: installed
Checking iw: installed
Checking ip: installed
Checking tcpdump: installed
Checking dumpcap: installed
Checking airmon-ng: installed
Checking existing WLAN interfaces: wlan0
Checking wlan0 status: available
Checking wlan0 monitor mode (iw): not supported
Checking wlan0 monitor mode (airmon-ng): not supported
Diagnostics completed.
I figured it out, I ran
airmon-ng check kill
I think I had some conflicting processes. Working great now.
I have tried to use your Explorer product to show the DFS channels used by WISA transmitters and receivers and even though the channels are in use they do not show up on your scan on either my M1 Mac or My older Intel MacBook. Is there a way to see these channels and look for interference?